

Showing posts with label Christmas. Show all posts
Showing posts with label Christmas. Show all posts
December 12, 2014


November 30, 2014

September 27, 2013
White Christmas Mice

My first Christmas decorations of 2013. I'm enjoying needle felting and it's been an easy craft to carry around and work on. Everything fits into a cute box. This week I'm showing some of my White Christmas Mice in Crystal Pink.
January 1, 2013
Retro Living Room at Christmas Time
Wow! the holidays can be a rush! No time to blog, but we finished our mid century living room!


We had a ball decorating our living room during the Christmas season. It was an empty room, I started just before Halloween, and painted the room light avocado. Halloween night the couches arrived from Overstock. After that piece by piece we built a mid century style room. Just like when we were kids.
This post has LOTS of photos, to see them all and THE LAMP CAT click on the page break below.
December 12, 2011
Walken in a Winter Wonderland, Shakey Head Card
Happy Holidays! Mine are crazy! It's lots of fun, but the fun and preparing for fun just never ends. I can barley keep up with The Crafty Pad. Have you seen our latest challenge? It's "Send Someone A Smile". (please no Christmas or Birthday)
This is one of my joke cards. I like to do a silly one here and there. On an earlier post I did one of these with the phrase "Walken On Sunshine".


This is 80% computer done. The hardest part was the research to locate my best background, head shot and jacket choices. I just cut out the full card and score. Cut out the jacket and Christopher's head. Create a spring and attach to the head and use double sided tape under his elbows to wrists. Tape the spring low under where the jacket will go. Squeeze the image lightly to secure to the card creating a slight raised bump over the spring. Adjust spring behind the jacket neck. Bingo, goofy card to make someone smile.
I gave one of these to friend last year. She placed it on the hall table and when anyone passed by the breeze caused the head to shake. Great goofy fun! Merry Christmas and Happy Hanukkah, Happy Kwanza and Happy Mother Spirit to all!

This silly card is entered is these card challenges...if I could find one that fits:)
Lexi's Creations, Untraditional Christmas, no Red or Green (1/7)
This is one of my joke cards. I like to do a silly one here and there. On an earlier post I did one of these with the phrase "Walken On Sunshine".


This is 80% computer done. The hardest part was the research to locate my best background, head shot and jacket choices. I just cut out the full card and score. Cut out the jacket and Christopher's head. Create a spring and attach to the head and use double sided tape under his elbows to wrists. Tape the spring low under where the jacket will go. Squeeze the image lightly to secure to the card creating a slight raised bump over the spring. Adjust spring behind the jacket neck. Bingo, goofy card to make someone smile.
I gave one of these to friend last year. She placed it on the hall table and when anyone passed by the breeze caused the head to shake. Great goofy fun! Merry Christmas and Happy Hanukkah, Happy Kwanza and Happy Mother Spirit to all!

This silly card is entered is these card challenges...if I could find one that fits:)
Lexi's Creations, Untraditional Christmas, no Red or Green (1/7)
December 4, 2011
Sing a Song of Christmas, #150 with The Crafty Pad. Free Santa Label Digi too!
Howdy! and Happy Holidays! It's a new challenge with The Crafty Pad. Challenge #150 is "use at least three punches". We offer a prize too! This week we are sponsored by Crafty Emma's and you could win a Crafty Emma's Store £10 voucher to spend in shopping. While you are here visit The Lavender Kitties for a FREE Santa Label digi. Click on the Lavender Kitties Free Stuff button.


My card is counting a cricut as one of the punches and Marvy helped me with the other two. I followed "Case Study" for the layout and I've taken my colors from "Pals Paper Arts". I really missed playing challenges with these folks.
I've used Debbie's digi stamp "Rudolph and Robin" this week (available at The Crafty Pad Design Store) and played with it on a graphics program (Corel). I broke up the image to use the characters independent of each other. I found a nice watermark image of a homey snow scene and placed the digi images "in the snow". With this I made a card liner and punched two holes (through the spine) and ran ribbon through to secure. I also took little Robin and made a little glittered covered medallion stamp out of him for the front of my card. The lace is machine sewn and the bow is handmade. So much fun making this card. I barely got it submitted in time for The Crafty Pad DT group. But I so wanted to play Case Study and Pals Paper Arts.
I hope you are inspired to play our challenge at The Crafty Pad. Drop by and see our fun at play. Merry Christmas!
This card is entered with these great challenges:
Case Study, casing Amy Sheffer, Dec Muse
Pals Paper Arts, color challenge, Cherry, Avocado, Vanilla
Colour Create Challenge, Red, Green, White 2wk (12/15)
Raise the Bar, It's beginning to look alot like Christmas (Jan/1)
Stamp, Scrap & Doodle, Holiday Card (12/10)
Clearly i Stamp, Christmas (12/10)
Through the Craftroom Door, Happy Holidays, (12/17)
Crop Stop, Punch your Holidays Away (12/10)
Ribbon Reel Challenge, Anything Goes, (12/11)
Cupcake Inspirations, Cupcake icing in Red, Green and White (12/11)


My card is counting a cricut as one of the punches and Marvy helped me with the other two. I followed "Case Study" for the layout and I've taken my colors from "Pals Paper Arts". I really missed playing challenges with these folks.
I've used Debbie's digi stamp "Rudolph and Robin" this week (available at The Crafty Pad Design Store) and played with it on a graphics program (Corel). I broke up the image to use the characters independent of each other. I found a nice watermark image of a homey snow scene and placed the digi images "in the snow". With this I made a card liner and punched two holes (through the spine) and ran ribbon through to secure. I also took little Robin and made a little glittered covered medallion stamp out of him for the front of my card. The lace is machine sewn and the bow is handmade. So much fun making this card. I barely got it submitted in time for The Crafty Pad DT group. But I so wanted to play Case Study and Pals Paper Arts.
I hope you are inspired to play our challenge at The Crafty Pad. Drop by and see our fun at play. Merry Christmas!
This card is entered with these great challenges:
Case Study, casing Amy Sheffer, Dec Muse
Pals Paper Arts, color challenge, Cherry, Avocado, Vanilla
Colour Create Challenge, Red, Green, White 2wk (12/15)
Raise the Bar, It's beginning to look alot like Christmas (Jan/1)
Stamp, Scrap & Doodle, Holiday Card (12/10)
Clearly i Stamp, Christmas (12/10)
Through the Craftroom Door, Happy Holidays, (12/17)
Crop Stop, Punch your Holidays Away (12/10)
Ribbon Reel Challenge, Anything Goes, (12/11)
Cupcake Inspirations, Cupcake icing in Red, Green and White (12/11)
November 26, 2011
Ho Ho Ho Mailbox, Recipe Challenge with The Crafty Pad
Making a card for The Crafty Pad today was almost impossible. The weddings continue around here. One more tomorrow in the park. But I digress...for our challenge this week with The Crafty Pad I went for a craft that also allows me to get a start on decorating my home. I've used the "Ho Ho Ho Santa" digital stamp, and you could too. It's available at The Crafty Pad Design Store- along with many, many other cute digital stamps. This week our challenge is a Theme Recipe of 3's - Use 3 papers, 3 brads or buttons, 3 ribbons.

I can put paper on MY mailbox...because I live in Tucson. Meaning, we don't get much rain. On the sunny side of the box (also where traffic passes by) I covered with 12 x 12 Christmas scrapbook paper. (covers my numbers too:) My extra large digi stamp is brightly colored, I did so in my Corel graphics program. I spray glittered everything except the 3 recipe pieces. For the challenge I made 3 little medallions with 3 buttons, 3 ribbons and 3 different papers. I then wrapped dark red organza ribbon around the whole box and tied a 3 layers bow. It's cute.
This is an easy project to do around the house. Any image can be used. To waterproof (a bit) you could spray the project in clear acrylic first. I wish you all a wonderful start to the new holiday season. Merry Christmas!

2 Sisters, Holiday (12/4)
Hiding in My Craft Room, Mix it Up-Holiday (12/3)
Simply Create Too, All About christmas (2wk 12/9)
Little Red Wagon, Christmas Theme (11/30)
Penny's Paper, Tie One On (2wk 12/7)
Stampin' With The Dragon, Anything Goes/Christmas (12/2)
(Well....it's been up a week. It rained. And it's still ok!!!! I sprayed oil based glitter over the project and it's REALLY made the wrapping last.)

I can put paper on MY mailbox...because I live in Tucson. Meaning, we don't get much rain. On the sunny side of the box (also where traffic passes by) I covered with 12 x 12 Christmas scrapbook paper. (covers my numbers too:) My extra large digi stamp is brightly colored, I did so in my Corel graphics program. I spray glittered everything except the 3 recipe pieces. For the challenge I made 3 little medallions with 3 buttons, 3 ribbons and 3 different papers. I then wrapped dark red organza ribbon around the whole box and tied a 3 layers bow. It's cute.
This is an easy project to do around the house. Any image can be used. To waterproof (a bit) you could spray the project in clear acrylic first. I wish you all a wonderful start to the new holiday season. Merry Christmas!

2 Sisters, Holiday (12/4)
Hiding in My Craft Room, Mix it Up-Holiday (12/3)
Simply Create Too, All About christmas (2wk 12/9)
Little Red Wagon, Christmas Theme (11/30)
Penny's Paper, Tie One On (2wk 12/7)
Stampin' With The Dragon, Anything Goes/Christmas (12/2)
(Well....it's been up a week. It rained. And it's still ok!!!! I sprayed oil based glitter over the project and it's REALLY made the wrapping last.)
November 23, 2011
Snowflake Card, last visit as GT with "4 Crafty Chicks"
I've been a busy chick. We've had two quickie marriages in the family over the last week. I've been keeping assorted children here and there and I'm pooped. I did manage to create my last card for the "4 Crafty Chicks". The theme for this challenge round is "Snowflakes".

I computer drew the pointed stars and printed them and the labels. For all the points on the snowflake- I punched tiny, tiny flowers and also regular hole punch pieces. I've glued them to the points and covered everything in sugar glitter. (clear fine) My labels are glittered too. I use spray glue in a box. My box is great, I spray all kinds of stuff in it. Seam ribbon is self dyed and wrinkled. I used double tape to make the strip ribbon across the bottom. Pearls all around and a pin too. Last but not least.....gobs of pop tape!
This could be an easy card to reproduce for the many many more I still need to make. I hope you are doing well with your Christmas card creations this year too!
Thanks for the visit I hope you play the challenge at "4 Crafty Chicks".

This card is also entered with:
Charisma Cardz, Snowflakes (12/1)
Moving Along With The Times, Ribbons and Bows (12/1)
Pals Paper Arts, Pearls (12/1)
The House That Stamps Built, Christmas card w/ Snowflakes (12/5)
Inky Impressions, Make an Embellishment (I made the Snowflake) (12/5)
Scrapbook Sisters, Christmas Time (12/5)
Ladybug Crafts Ink, Winter Blues, (12/4)
Ribbon Carousal, Holiday Hoopla, something from a spool, I used old seam ribbon (12/4)
UPDATE: This card won with Ladybug Crafts! Whee! I nearly missed the win because I almost never check for wins under the name "Victoria" when I visit Feline Playful. I'll be changing my ways hereon.

I computer drew the pointed stars and printed them and the labels. For all the points on the snowflake- I punched tiny, tiny flowers and also regular hole punch pieces. I've glued them to the points and covered everything in sugar glitter. (clear fine) My labels are glittered too. I use spray glue in a box. My box is great, I spray all kinds of stuff in it. Seam ribbon is self dyed and wrinkled. I used double tape to make the strip ribbon across the bottom. Pearls all around and a pin too. Last but not least.....gobs of pop tape!
This could be an easy card to reproduce for the many many more I still need to make. I hope you are doing well with your Christmas card creations this year too!
Thanks for the visit I hope you play the challenge at "4 Crafty Chicks".

This card is also entered with:
Charisma Cardz, Snowflakes (12/1)
Moving Along With The Times, Ribbons and Bows (12/1)
Pals Paper Arts, Pearls (12/1)
The House That Stamps Built, Christmas card w/ Snowflakes (12/5)
Inky Impressions, Make an Embellishment (I made the Snowflake) (12/5)
Scrapbook Sisters, Christmas Time (12/5)
Ladybug Crafts Ink, Winter Blues, (12/4)
Ribbon Carousal, Holiday Hoopla, something from a spool, I used old seam ribbon (12/4)
UPDATE: This card won with Ladybug Crafts! Whee! I nearly missed the win because I almost never check for wins under the name "Victoria" when I visit Feline Playful. I'll be changing my ways hereon.
November 17, 2011
Christmas Card Paper Piecing, Guest Designing for 4 Crafty Chicks
Good day to all! (This post should have come out this morning but life got in the way. I lost internet over night. All is back now, I hope.) Week 3 as guest designer for 4 Crafty Chicks and a challenge for Paper Piecing. I started with a base sketch I used a few months ago and ended up with this cutey.


Everything used on this card is old. The feathers are ancient. My medallian is pretty straight forward, I have this great retro Santa digital image and he was printed in dark red and covered in fine clear glitter. My ribbon is seam binding that I dyed last year. And so everything old is new again. Simple can be sooooo good.


Everything used on this card is old. The feathers are ancient. My medallian is pretty straight forward, I have this great retro Santa digital image and he was printed in dark red and covered in fine clear glitter. My ribbon is seam binding that I dyed last year. And so everything old is new again. Simple can be sooooo good.

November 8, 2011
White on White, Glitter and Feathers
Greetings, It's Saturday, time for a new challenge with The Crafty Pad. Debbie made a lovely snowman stamp that we are using in our DT cards. The Crafty Pad Design Store is a great place to find digital stamps. Our challenge is #148 White on White. This should turn out to be a great challenge! I hope you all play!

This week I was able to work out a card from all old stuff. Heck the feathers themselves are over 6 years old. Everything else is more like 6 months old:)
To make a fancy, fancy label, I die cut two spellbinders "fancy" labels and one cut of labels 18. Scissor cut the two fancys in half. Tape these four pieces to the back of the punched label. Da Da! Pretty easy huh?
My card background is pop taped to the base card, as layer one. I randomly strip scored the background cardstock. After spraying glue and glittering with fine clear, it gives a little texture thanks to the scoring. My stamped image is clear glittered too. It does make for a difficult photograph of my card, but in person the glittered imaging is charming, like ice and snow. I made the pin from jewelry pieces picked up at Joanns. Just glue to the pin head. Light gray seam ribbon for my bow. A friend noted how nice the bow looks.......sweet kid....there's tape on the back of it to keep the loops where I want them. I wish I could make a great bow. Pearls and feathers make up the rest. The feathers of course mimic snow in a way, but it's also about as close as I'll get to real snow here in Tucson Az.
Well, thanks for stopping by...I always love the visit. Thanks so much! Take care.

This card has also been entered into these fine challenges:
Cardmadfairy's Digi Days Challenge, Texture (11/25)
Fab N Funky Challenges, Mostly White (11/16)

This week I was able to work out a card from all old stuff. Heck the feathers themselves are over 6 years old. Everything else is more like 6 months old:)
To make a fancy, fancy label, I die cut two spellbinders "fancy" labels and one cut of labels 18. Scissor cut the two fancys in half. Tape these four pieces to the back of the punched label. Da Da! Pretty easy huh?
My card background is pop taped to the base card, as layer one. I randomly strip scored the background cardstock. After spraying glue and glittering with fine clear, it gives a little texture thanks to the scoring. My stamped image is clear glittered too. It does make for a difficult photograph of my card, but in person the glittered imaging is charming, like ice and snow. I made the pin from jewelry pieces picked up at Joanns. Just glue to the pin head. Light gray seam ribbon for my bow. A friend noted how nice the bow looks.......sweet kid....there's tape on the back of it to keep the loops where I want them. I wish I could make a great bow. Pearls and feathers make up the rest. The feathers of course mimic snow in a way, but it's also about as close as I'll get to real snow here in Tucson Az.
Well, thanks for stopping by...I always love the visit. Thanks so much! Take care.

This card has also been entered into these fine challenges:
Cardmadfairy's Digi Days Challenge, Texture (11/25)
Fab N Funky Challenges, Mostly White (11/16)
October 15, 2011
Reindeer Pencil Toppers, reposted from Kids4Crafts.com

Hi, this is a November 15th 2008 repost from my other blog, Kids4Crafts.com.
These little reindeer are darling, even if I do say myself. Last month I made a few pencil toppers and the spiral ones gave me the idea to create these odd fellows. Really fun at school and make nice gifts from kid to kid. I borrowed my niece Holly for these step by step photos. Holly is 10 and did a wonderful job as my assistant. These are the now famous “Reindeer Pencil Toppers” that we will be doing in our demonstration on Dec. 13th at Bookman's on Speedway in Tucson. Children of all ages are welcome at the show and please try these at home and send us a note and photo.(UPDATE: this event was really quite a blast! We did 3 demo's and had lot's and lot's of kids:). I called these "now famous" because these Reindeer Pencils Toppers get SO MANY VISIT/HITS each fall and winter it's nearly monstrous!
Items Used:
2 Pipe Cleaners
1 New Pencil
Spare Pencil
5 Shiny Pony Beads
1 Red Pony Bead
2 Googly Eyes
Tacky Glue or Heavy Duty Glue Dots or Hot Glue
(depending on child’s age group)
Directions for Righties: Pick up 2 pipe cleaners. Even up their ends (see photo above) and hold in your right hand. Using your left thumb press pipe cleaners against a pencil about 2 inches below the eraser at the ends and start wrapping tightly about 3 times around the top of the pencil with your right hand. Try to keep the pipe cleaners flat as you wrap upward toward the eraser, this will form your reindeer face area (see photos below).

Your thumb is very important to spiraling the pipe cleaners around pencils so hold it firmly while you wrap. Twist the 2 pipe cleaners together where you stop just behind the eraser, and separate them a little (like giant rabbit ears).

Take the spare pencil and repeat the spiral wrapping on each pipe cleaner antler. Holly took a short cut here by taking the spare pencil and placing it midway atop the reindeer pencil on the eraser end and wrapped both sides of the spare pencil. It looked like a big letter “T” her way. And I've found it to work great for me too. Gently slide the spare pencil out of the wrap you just created. Now your have 2 antlers and a plain face.

Through trial and error we have found that you should glue the face on last and slide the 5 colored beads down the antlers now, 3 on one side and 2 on the other. Glue on googly eyes and little red bead nose (I glued the nose vertically and the hole is seen from the side). On a few pencils at my house I tied a little bell on a thin red ribbon around the bottom of the reindeer’s neck, though this might not be a good idea for pencils to be used in school.

You have a cute reindeer pencil! Make some for your school chums and teachers as gifts.
This is an original Victoria Swanson/Lavender Design, and was published in 2008. It's my most famous creation (if any of us can have that kinda thing) and I'd love you to have fun making these in your home or re-selling for charity (like we've done at my church) it's quite cool to repost my Reindeer, just please remember to give credit and back link to either kids4crafts.com or victorialavender.net.
Thanks so much for this visit. There's fun things to make for the Holidays at kids4crafts. By the way...I need help with kids4crafts. New posts of great ideas are welcome for review. If they fit the criteria for the website, you could be a guest designer. Cool huh?
Peace, love and chicken (Homer Simpson)

November 23, 2010
Snowman Christmas Cards

Today I'm making cards by creating more embellishments than I buy. I do this a lot. Embellishments have got to be the most expensive of the little things we buy to create our homemade cards. Well, add a little more "homemade" to the mix by making your own.

I like to look at the pretty embellishments all packaged so lovely....but mostly I'm looking to see how I may re-create it at home. A good start is to buy 12 x12 printed cardstock with designs just screaming to be cut out. Such is the case with this pack of paper I bought at Michaels. It's called "Snowflake Christmas Paper Pad" by Ellen Krans, "Me & my big ideas".

I love medallion's! Pictures or words. I've used 2 sizes of circle punches for the Merry Christmas sentiment. Single or double layering is up to your style. But I'm crappy at stamping. So in order to get 5 good prints, I stamped front and back all over a single card stock page and punched out the best.

These snowmen are so cooool! I could see these guys as soon I walked into Michaels. There's 2 sheets in the collection and there's also are 5 snowmen on the paper pack cover. (15 cards) Lots of other images to cut out and make great embellishments. The papers are very bright, foiled, glittered and kinda retro. A "must check out" if you find yourself at a paper store.
I cut these on the print line with a small sharp scissor. Easy enough to do while watching TV. I cut the arms arms off and replaced with pipe cleaners, and used foam tape to pop and layer.

Speed ribbons. Tape the ribbon to the back of the card cover. Its fast, it works. You can still take a piece of ribbon to tie a bow or knot and it will slide to the perfect placement.

A fun card.
Make some embellishments!
Have fun, save money!
July 1, 2010
Recycled Christmas Cards

Everyone has Christmas cards from years past. Lets take a new look at them. Kids are great at transforming an older card into a new one. Get out your scissors and punches, glues, glitter, snow, ribbons and string. This family craft is one of the best for "no cost" crafting fun.
The following images are from the work I did last Christmas. I've done cards and tags and the last three are refrigerator magnets, these can make nice gifts too. Enjoy!


These next few are my christmas card magnets.
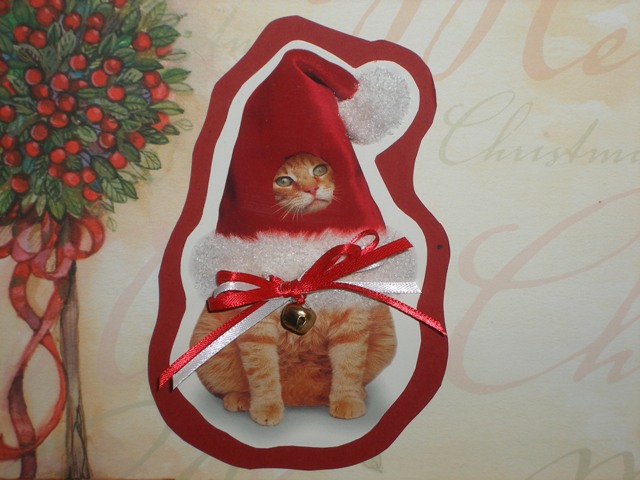


I really love the magnets, comic cards work great!
Take care, I'll try not to be so late with our next craft.
Peace, Victoria Swanson
Subscribe to:
Posts (Atom)